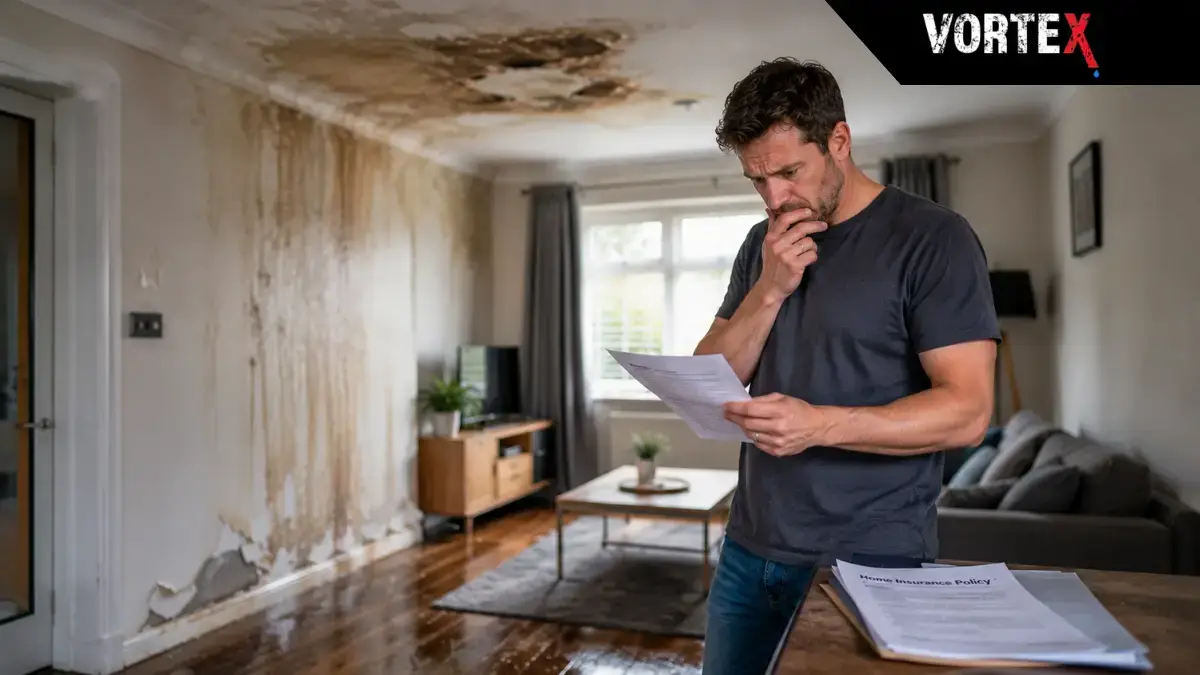
A central heating leak rarely announces itself with water on the floor. The more typical experience is a boiler pressure gauge that needs topping up every week, a patch of ceiling that looks faintly discoloured in one corner, or a room with a persistent damp smell that nobody can quite trace to a clear source. By the time something genuinely visible appears, the leak has often been active for months.
Knowing how to find a leak in a central heating system can save you a significant amount of money, not only in immediate repair costs but in the structural and cosmetic damage that accumulates while a leak goes uninvestigated. This guide covers the warning signs worth taking seriously, a step-by-step investigation process homeowners can work through, the professional central heating leak detection methods that locate concealed leaks without causing unnecessary disruption, and what happens when a heating leak is left too long.
Why Central Heating Leaks Stay Hidden for So Long
The main reason central heating leaks go undetected is straightforward: most of the pipework in a UK property is not visible. Pipes run beneath floorboards, inside stud walls, through ceiling voids, and beneath screeded floors. A leak in any of these locations will not produce water at the surface immediately. Instead, it saturates the material around it gradually, causing damage that may not become obvious for weeks.
Water released from a pressurised heating circuit also travels. It does not stay beside the point where the pipe failed. It follows the path of least resistance along joists, through insulation, and down through the building fabric, sometimes emerging as a damp patch several metres from the actual leak point. This is why investigating only the area where damage is visible so often produces nothing useful. The symptom and the source are frequently in different rooms.
There is also the behaviour of the system itself to consider. A sealed central heating circuit is pressurised, and some leaks only release water when the system is running at full operating temperature and pressure. Switch the boiler off before carrying out a visual inspection and there may be nothing to find at all. Without detection equipment that works on a live, pressurised system, this category of leak is extremely difficult to locate by eye alone.
The Most Reliable Signs of a Leak in a Central Heating System
The following symptoms do not each confirm a heating leak on their own, and some have alternative explanations. A combination of two or more, particularly when they persist or worsen over time, is a reliable reason to investigate rather than wait.
Boiler pressure that keeps dropping
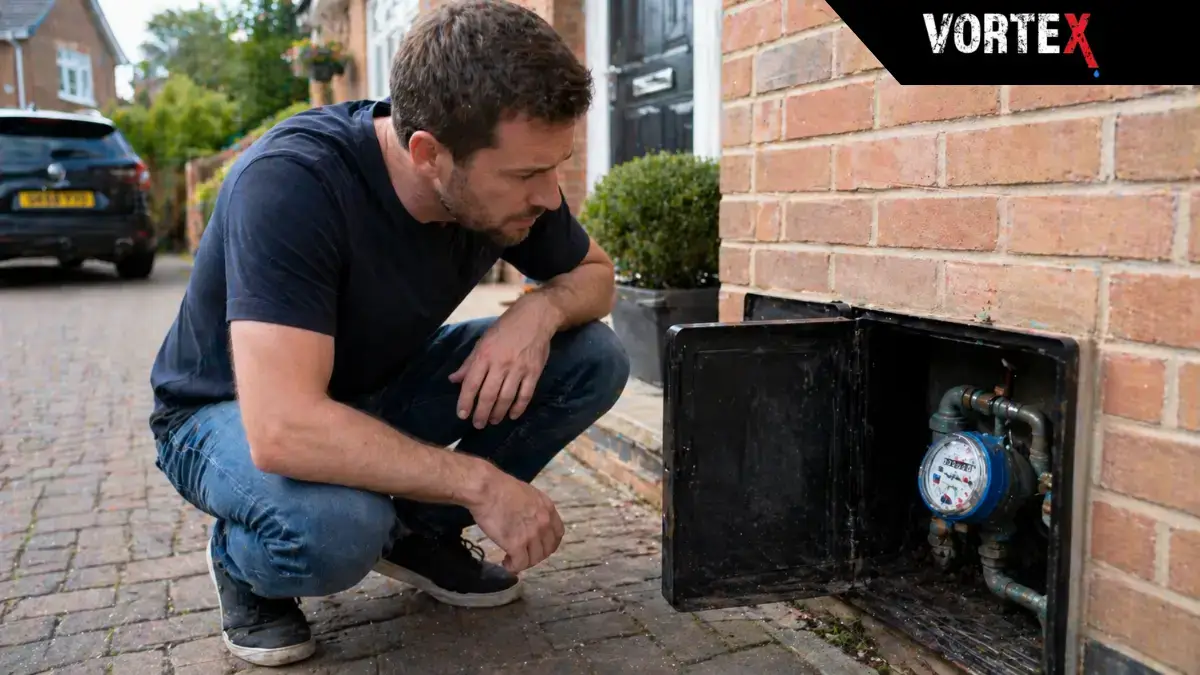
A sealed central heating system should maintain its pressure consistently, typically holding between 1 and 1.5 bar when cold. If you find yourself regularly re-pressurising the boiler, that pressure has to be going somewhere. Bleeding radiators accounts for a small, one-off drop. Anything beyond that, particularly a slow but consistent decline over days or weeks, points strongly towards water escaping from the circuit. This is the most direct and measurable early sign of a heating system leak and the first thing worth recording.
Damp patches, staining, or mould in unexpected places
Damp patches on ceilings, walls, or floors that have no obvious external cause are worth investigating. They may appear as a faint watermark, a yellowish tide mark, or persistent localised mould growth. If the affected area has no external wall nearby, no history of roof problems, and no obvious plumbing explanation above it, a heating pipe is a credible candidate. That said, a proper investigation is always needed before drawing conclusions, because not every damp mark is a heating leak.
Radiators cold at the bottom
A radiator that is warm at the top and cold at the bottom suggests iron oxide sludge has settled at the base, which is frequently a consequence of internal corrosion within the heating circuit. This symptom does not confirm a leak on its own, but it points to a system that is worth looking at more closely.
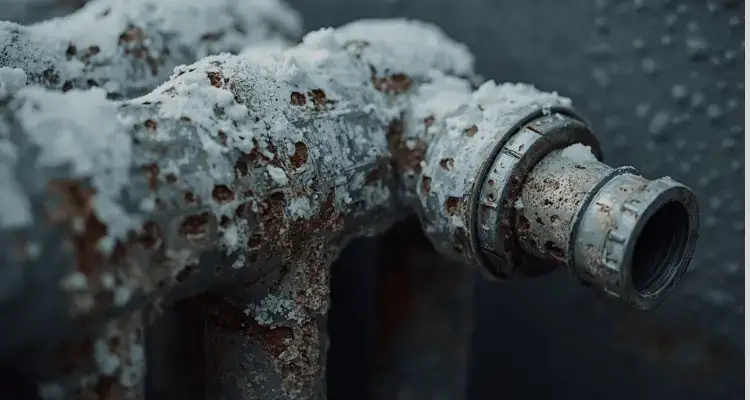
Rust or mineral deposits around valves and pipe joints
Rust staining or white and grey mineral deposits around radiator valve connections, visible pipe joints, or the boiler connection points are a physical sign that water has been seeping and evaporating at that location over time. A very slow seep, too minor to form a drip, will still leave residue behind across days and weeks. These marks are easy to overlook during a quick check but are consistently reliable as early physical indicators of a joint failure.
Energy bills rising without any change in heating use
A heating circuit losing pressure forces the boiler to work harder to maintain the system temperature. If energy bills have climbed without any corresponding change in how the heating is being used, reduced system efficiency from a slow leak may be a contributing factor. On its own this is not enough to be certain, but as part of a wider pattern it is a useful piece of the picture.
Gurgling or kettling sounds from the boiler or pipes
Air entering the heating circuit through a leak point creates noise. Gurgling sounds in the pipework and a kettling sound from the boiler are both associated with air being drawn into the system as water escapes. These symptoms have other possible causes, but their presence alongside others on this list adds weight to the case for a proper investigation.
Why Finding the Exact Source Is Not Straightforward
Identifying several symptoms from the list above does not make pinpointing the actual leak location any easier. Even experienced plumbers who work with heating systems regularly acknowledge that concealed leaks are genuinely difficult to locate without specialist equipment. There are a few specific reasons.
Water travels unpredictably. A leak in a first-floor heating pipe can cause a damp patch in a ground-floor ceiling. A buried pipe beneath a screeded kitchen floor can push water under the screed until it emerges as damp at the base of a wall in the adjoining room. The distance between the symptom and the source is sometimes significant. Investigating only where damage is visible will frequently find nothing.

Intermittent leaks add a further layer of difficulty. A small joint failure that only weeps under full operating pressure will show nothing at room temperature with the boiler off. The same joint may look entirely dry on visual inspection. Without pressure-testing the system and using detection equipment capable of working on a live, pressurised circuit, intermittent leaks are very easy to miss. The absence of visible evidence is not the same as the absence of a leak.
A Practical Step-by-Step Investigation for Homeowners
The following process will not locate every type of heating leak. A concealed leak beneath a screeded floor or within a wall cavity will require professional equipment regardless of how thorough the preliminary investigation has been. However, working through these steps provides useful information, rules out obvious causes, and gives a specialist a significantly clearer starting point if a professional survey is needed.
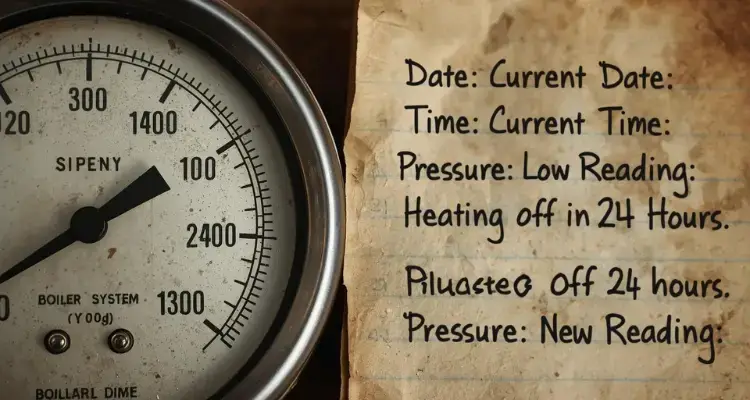
Step 1: Record and monitor the boiler pressure gauge
Write down the pressure reading on the boiler gauge when the system is cold. Note the date and time alongside it. Leave the heating switched off for 24 hours and check the reading again. A measurable drop confirms that water is leaving the circuit. The rate of drop is useful context. A slow, gradual decline over several days points to a small pinhole or minor joint seep. A significant drop within 24 hours suggests something more substantial.
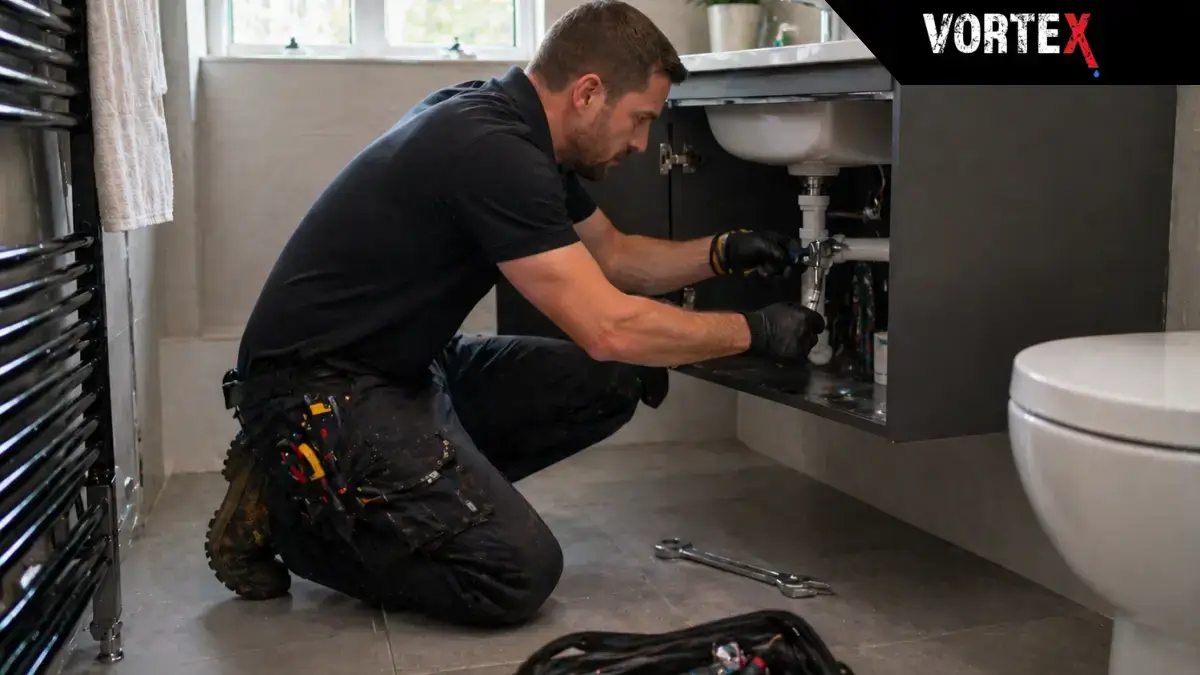
Step 2: Inspect all accessible joints, valves, and connections
With the system running at full operating temperature and pressure, check every radiator valve connection and all visible pipe runs. Press a dry piece of white tissue against each joint and look for any dampness that would not be visible to the eye. Check underneath the boiler and around all boiler pipe connections. Note and photograph any rust staining, mineral deposits, or discoloration around pipe surfaces, even if nothing appears wet at that moment. Residue confirms that water has been escaping there previously.
Step 3: Check beneath floorboards in the affected area
If a floorboard near the area of concern can be safely lifted, the void below can reveal significant evidence. Staining on joists, moisture on the subfloor, any pooling of water, softening of timber, or localised mould growth are all signs of water that has been present in that space over time. The position of any damage relative to the pipe runs below can help a specialist understand the likely direction of travel and reduce the search area considerably.
Step 4: Try isolating individual zones if the system allows
On some central heating systems it is possible to close the radiator valves on one zone at a time and monitor whether the pressure drop slows or stabilises. If pressure holds after isolating a particular section of the circuit, the leak is most likely within that section. This technique is a practical way to narrow the scope before a specialist is involved. If you are unsure about how to isolate sections of your system correctly, do not attempt it.
Step 5: Compile all findings before calling a specialist
Before booking a professional survey, note down: when you first noticed the problem and what the symptom was, the rate of pressure loss you recorded, the location and timing of any visible damp or staining, whether symptoms are consistent or come and go, and whether any recent work was carried out on the system. A specialist who arrives with this information can focus their investigation from the outset rather than starting without context, which reduces time on site and cost.
When to stop and call a professional
If you have worked through the steps above and cannot identify a clear source, or if active water damage is occurring and needs to stop, do not wait. The longer a heating leak continues, the greater the secondary damage becomes. A professional central heating leak detection survey can typically locate the source within a single site visit, without speculative damage to floors, walls, or ceilings.
Check Also: What Are the Earliest Signs of a Hidden Heating Leak?
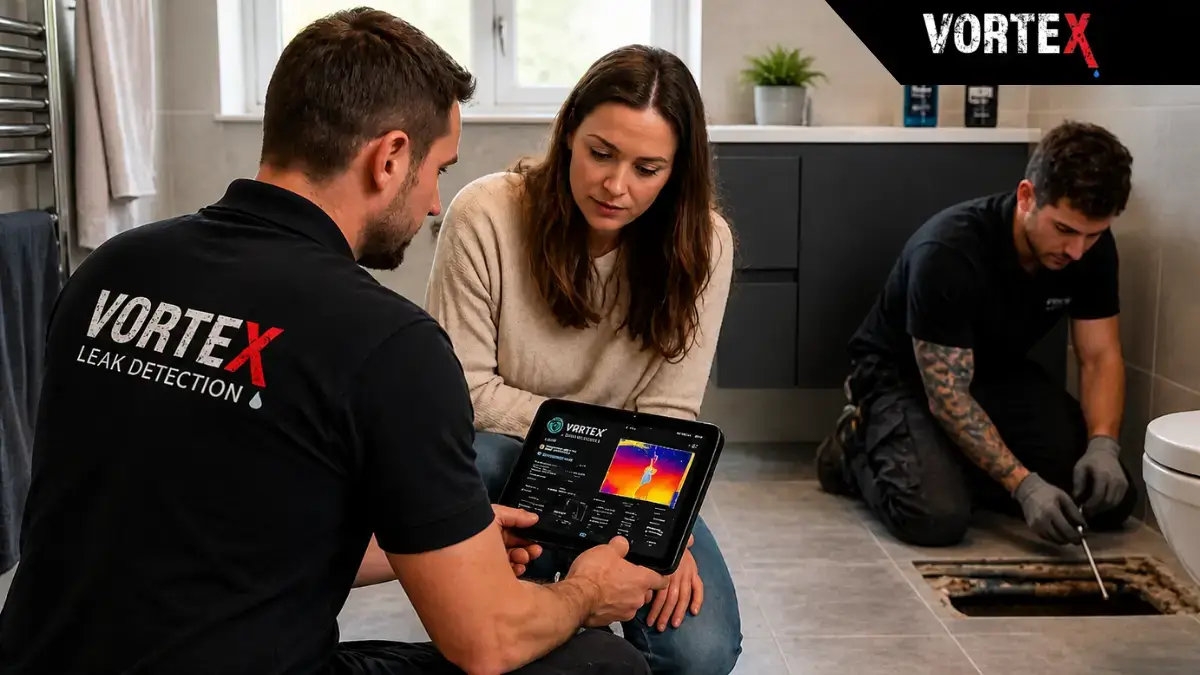
Professional Central Heating Leak Detection Methods
When a leak cannot be located through visual inspection and pressure monitoring, professional central heating leak detection applies purpose-built methods that work on concealed pipes without requiring destructive investigation. The method chosen depends on the type of system, the construction of the building, and the information gathered during the initial assessment.
Acoustic leak detection
Acoustic detection equipment listens for the sound of pressurised water escaping from a pipe. Even a very small leak beneath a concrete floor or behind a plaster wall creates a distinctive frequency that trained instruments can identify. The specialist takes readings from multiple positions and correlates the results to pinpoint the source accurately. Acoustic leak detection is particularly effective for leaks in buried pipework beneath solid floors or within wall chases where physical access is not possible without causing significant damage.
Tracer gas testing
Tracer gas testing introduces a safe, inert gas mixture, typically a blend of nitrogen and hydrogen, into the heating circuit under controlled low pressure. The mixture is non-toxic, non-flammable at the concentrations used, and leaves no residue in the property. As the gas escapes through the leak point, it rises through the floor or wall material above. The specialist uses a calibrated detection probe at the surface to trace the concentration of escaping gas and identify the precise exit point. Tracer gas is one of the most accurate methods available, particularly for leaks beneath screeded or tiled floors and within underfloor heating circuits where acoustic methods alone may not produce definitive results.
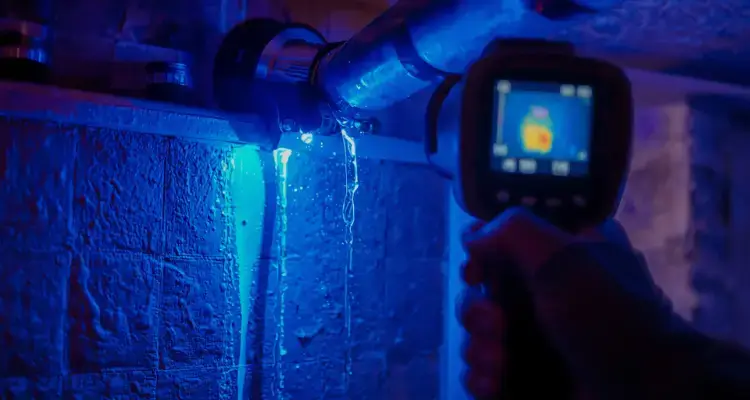
Thermal imaging
A thermal imaging camera detects surface temperature differences that are invisible without specialist equipment. Where a heating pipe is leaking, the surrounding material absorbs and releases heat differently from the undamaged areas around it, creating a thermal signature the camera reads clearly. Thermal imaging is well suited to underfloor heating systems, where the distribution of heat across the floor surface reveals anomalies in the circuit quickly. Properties across London, Hertfordshire, and Essex with underfloor heating fitted in extensions or refurbished ground floors benefit particularly from thermal imaging as an efficient first step, before a more precise location method is applied.

Moisture mapping
Where the main symptom is damp rather than measurable pressure loss, moisture mapping provides a structured way to trace water migration back towards its origin. Using calibrated moisture meters and specialist damp investigation probes, the technician plots moisture content across walls and floors to understand the path the water has taken. This prevents unnecessary damage to floor finishes and plasterwork in areas that are wet only because water has migrated there, not because the leak is located there.
The Cost of Leaving a Heating Leak Unaddressed
A central heating leak that is not found and repaired causes damage that compounds over time. Timber joists and subfloor material that remain saturated for months can lose structural integrity. Water inside a wall cavity accelerates corrosion of any metalwork, promotes persistent mould growth, and in serious cases affects indoor air quality. In properties with solid ground floors, prolonged moisture ingress can undermine the screed and the substrate beneath it.
The financial case for acting promptly is straightforward. The cost of a professional leak detection survey is almost always considerably lower than the combined cost of repairing water damage that accumulated because the leak was left to continue. This holds true even for relatively minor leaks in smaller residential properties.
There is also an insurance dimension to consider. Many UK home insurance policies require the policyholder to take reasonable steps to limit damage once a problem has been identified or reasonably suspected. A suspected leak that went uninvestigated for a significant period may affect how a claim is assessed. Keeping a clear record of when symptoms were first noticed and what steps were taken in response is simple, costs nothing, and can carry real weight if a claim follows.
Central Heating Leaks and Home Insurance
Whether a central heating leak falls within the scope of a home insurance policy depends on the specific policy wording and the nature of the damage. Most UK policies cover sudden and unexpected escape of water, such as a pipe that fails without prior warning and causes immediate visible damage. Slow and gradual leaks that have been active for an extended period attract more scrutiny, and some policies exclude damage caused by a leak the policyholder could reasonably have identified and reported sooner.

A professional leak detection report serves a direct practical purpose in this context. It documents when the leak was first investigated, what method was used to locate the source, and what access to the building fabric was required before a repair could proceed. Many insurers ask specifically for a trace and access report as part of the claims process for escape of water. A report prepared by a qualified specialist, which sets out the investigation in clear factual terms, removes ambiguity and supports the claim with documented evidence rather than uncertainty. Having that documentation is frequently the difference between a straightforward outcome and a protracted dispute with the insurer.
Reducing the Risk of Future Heating Leaks
No central heating system is entirely immune to developing a leak over time. Pipe walls thin, joints age, sludge accumulates, and an unmaintained system creates the internal conditions that accelerate these processes. A few consistent habits significantly reduce the risk and mean that if a problem does develop, it is caught at an early stage rather than after months of silent damage.
- Annual boiler servicing by a Gas Safe registered engineer includes checks for early corrosion, joint deterioration, and component wear. Problems caught at this stage are typically inexpensive to address. Left to develop, the same issues become considerably more costly.
- System inhibitor is a chemical additive introduced into the heating circuit that slows internal corrosion and the build-up of iron oxide sludge. Its concentration should be tested at every annual service and topped up as needed. An unmaintained circuit without adequate inhibitor will degrade noticeably faster.
- A magnetic filter fitted to the return pipe captures iron oxide sludge before it circulates through the boiler heat exchanger and smaller pipe runs, reducing the gradual wear that weakens connections over time.
- Checking the boiler pressure gauge once a month takes under a minute and gives the earliest possible warning of any developing pressure loss before secondary damage has a chance to build up.
- When building work affects heating pipework, including extensions, loft conversions, or underfloor heating installations, pressure-testing the completed system before floors and walls are closed is essential. All new joints should be clearly documented while they are still accessible. A joint that develops a fault inside a newly screeded floor will be far more expensive to locate and repair than one identified at the commissioning stage.
Read Next: Why Does Boiler Pressure Keep Dropping Without a Visible Leak?
Frequently Asked Questions
The clearest indicator is a sealed heating system that consistently loses pressure without an obvious cause. Combined with any of the following, this points strongly towards an active leak: unexplained damp patches or staining, unusual sounds from the boiler or pipes, rust or mineral deposits around valves, or a rise in energy bills with no change in how the heating is being used. Confirming and locating a leak with certainty requires a professional investigation.
No. A pressurised heating circuit will not seal a leak under normal operating conditions. Leak sealant additives can temporarily slow pressure loss from a minor seep, but they address the symptom rather than the source. Over time they can cause additional problems within the boiler and heat exchanger. A permanent repair requires the leak to be properly located and physically fixed.
Costs vary depending on the method used, the size of the property, and the complexity of the investigation. A residential survey using acoustic or tracer gas equipment typically starts from around 200 to 400 pounds. Investigations involving multiple methods or larger properties may carry a higher fee. In virtually every case, the cost of detection is considerably lower than the repair and reinstatement costs that result from undetected long-term water damage.
A plumber can identify and repair leaks that are visible at accessible joints, valves, or exposed pipe runs. Locating a concealed leak beneath a floor, within a wall cavity, or inside an underfloor heating circuit requires specialist detection equipment and the training to use it correctly. This falls outside the standard toolkit and scope of most plumbing work. Where the leak is not visible at the surface, a dedicated leak detection specialist is the right first call.
For most residential properties, a professional survey using acoustic or tracer gas methods takes between two and four hours. Larger properties or more complex investigations may take longer. A specialist should be able to give a realistic estimate of the likely time required when the survey is booked, based on the information provided about the symptoms and the property.
Yes. The mixture used in tracer gas testing is a blend of nitrogen and hydrogen. Both are non-toxic. At the concentrations used in a detection survey, the mixture is non-flammable. It dissipates quickly and leaves no residue in the building. Tracer gas testing is a widely used and well-established professional method across the UK leak detection industry.
Thermal imaging is highly effective for identifying the approximate area of a heating leak, particularly in underfloor heating systems where temperature differences across the floor surface are clearly visible to the camera. It works best when the system is active and a meaningful temperature differential has developed at the surface. For leaks in unheated pipe runs or in conditions where background temperatures vary considerably, it is typically used alongside acoustic testing or tracer gas for precise location rather than as a standalone method.