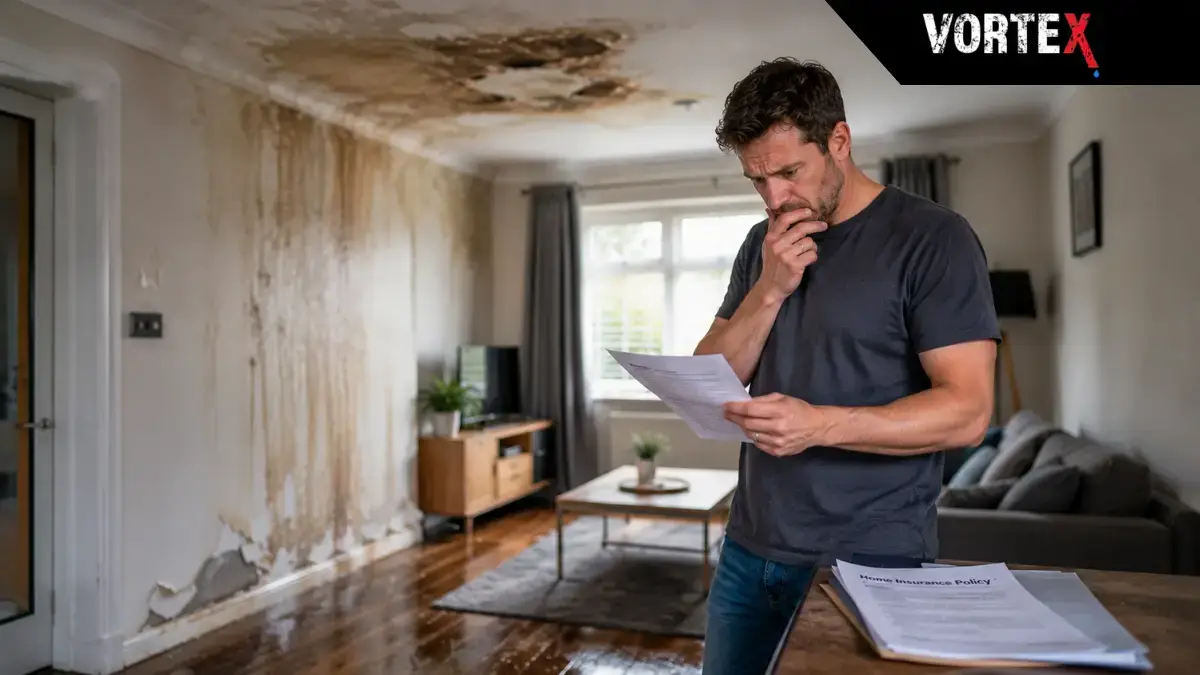
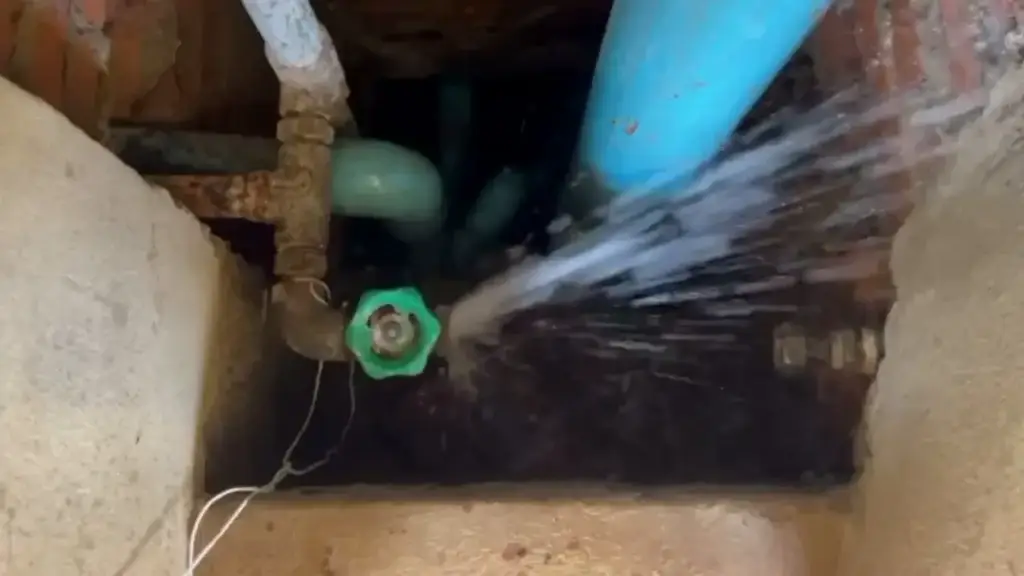
One of the most common concerns a homeowner expresses when they first consider calling a leak detection specialist is the fear of disruption. The instinctive assumption is that finding a hidden leak means lifting floorboards, breaking into walls, or cutting through concrete screed. That assumption is understandable, but in most cases it is wrong.
Modern specialist leak detection uses a combination of non-invasive methods that identify the source of a hidden leak by reading the signals the leak itself produces: heat, sound, and escaping gas. A trained specialist with the right equipment can locate a leak in a buried heating pipe, a concealed plumbing circuit, or a mains supply pipe running beneath a driveway without any physical access to the pipe itself and without any disruption to the floor or wall above it.
Understanding how these methods work, and how they are used together in a real investigation, removes the uncertainty that prevents many homeowners from acting early. The earlier a hidden leak is found, the less damage it causes and the simpler the repair that follows.
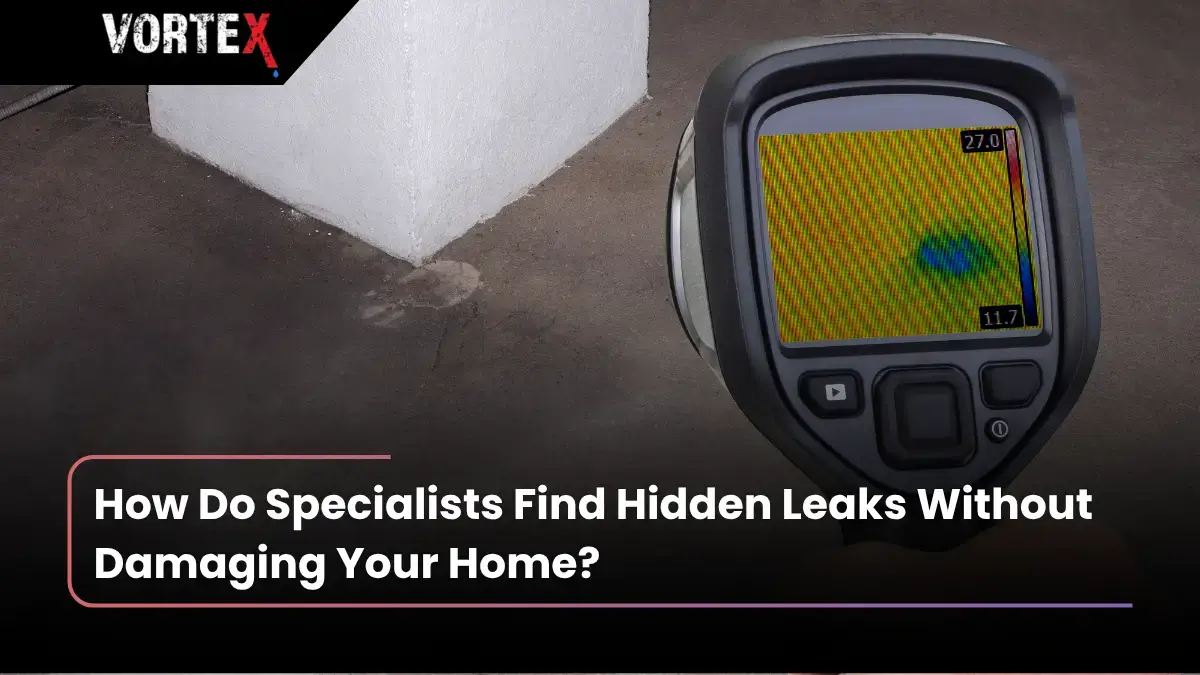
Quick Answer Specialists find hidden leaks using thermal imaging cameras, acoustic listening equipment, and tracer gas technology. These methods detect the heat, sound, and gas signatures produced by an escaping leak through walls, floors, and ground surfaces without any physical damage to the structure. In most investigations, the leak location is confirmed before any floor or wall is touched.
Why Finding a Hidden Leak Is Not a Guessing Game
A hidden leak leaves physical evidence even when it produces no visible surface sign. Water escaping from a pressurised pipe generates heat differences in the surrounding material, creates a detectable acoustic signal as it escapes under pressure, and can be confirmed at the surface using tracer gas that travels through the building fabric to exit at the leak point.
Specialist detection methods are designed to read these physical signals and use them to map where the water is coming from. The process is systematic rather than speculative. A specialist does not probe randomly into floors and walls hoping to find water. They build a picture of where the leak is located using measurement, equipment, and knowledge of how water behaves in different building materials and pipe configurations.
This approach is what separates a specialist leak detection survey from a general plumber’s inspection. A plumber is trained to work with pipework that is accessible. A leak detection specialist is trained to locate pipework that is not accessible and confirm where the failure point is before any access is required.
The Three Core Detection Methods: A Summary
The three primary methods used in specialist hidden leak detection are thermal imaging, acoustic detection, and tracer gas. Each method works differently, detects different types of evidence, and is most effective at a different stage of the investigation. Used in combination, they allow the specialist to narrow from a broad zone of suspicion to a precise leak location.
| Thermal Imaging | Acoustic Detection | Tracer Gas | |
| What it detects | Temperature differences caused by escaping warm or cold water in surrounding material | The sound of pressurised water escaping through building structure | Inert tracer gas escaping at the exact leak point and rising to the surface |
| Best leak scenarios | Underfloor heating, buried heating pipes, in-slab pipework | Any buried pressurised pipe in walls, floors, driveways, or gardens | Confirming the exact position of any hidden leak in buried or enclosed pipework |
| Surface disruption? | None. Reads through floor and wall surfaces | None. Sensors placed above the pipe route | None during detection. Access only needed at the confirmed repair point |
| Stage in process | Stage one: identifies the affected zone | Stage two: narrows down the leak section within the zone | Stage three: pinpoints exact position before any repair begins |
| Works on cold pipes? | Partially, depends on temperature contrast | Yes | Yes |
| Works on heating pipes? | Yes, highly effective | Yes | Yes |
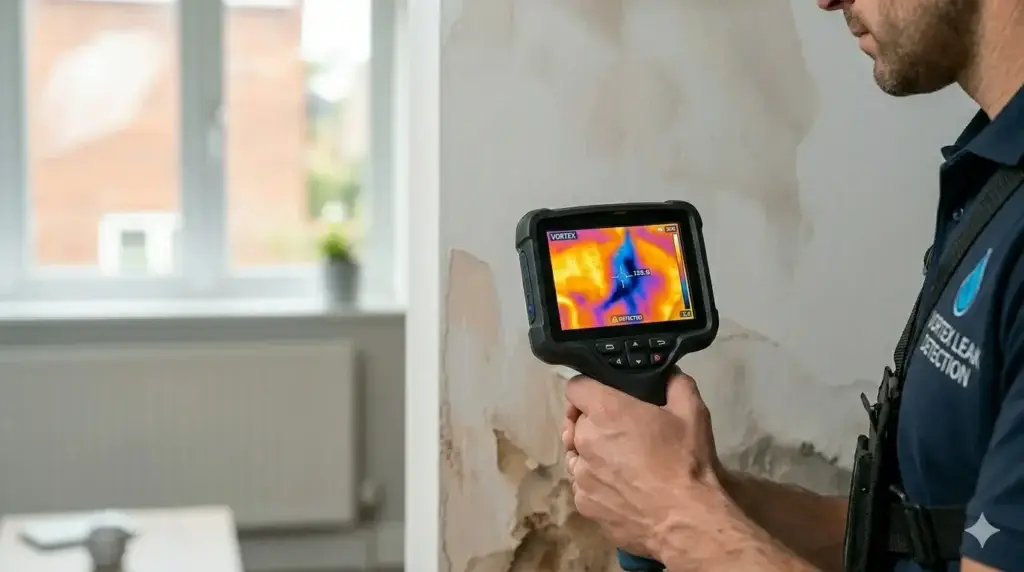
Thermal Imaging: How Specialists See Through Floors and Walls
Thermal imaging, also known as infrared thermography, works by detecting differences in surface temperature rather than looking for water directly. A thermal imaging camera does not see through a floor or wall in the same way an X-ray would. Instead, it reads the temperature of the surface above and around a suspected leak zone and identifies areas where heat is distributed in patterns that are inconsistent with the normal thermal behaviour of the building material.
What Thermal Imaging Can See
When a heated pipe leaks, the warm water it releases raises the temperature of the surrounding concrete, screed, or timber. This elevated temperature produces a thermal signature on the floor or wall surface above. A trained specialist can read this signature in the thermal camera image and identify the area where the pipe is losing water.
Thermal imaging is particularly effective for underfloor heating leaks and for heating circuit pipes running beneath screeded concrete floors. The warm water escaping from a buried heating pipe produces a clear and distinctive thermal pattern that maps closely to the leak zone. It is also effective for identifying areas of sustained moisture that have altered the thermal mass of the surrounding material, even where the water itself is no longer warm.
For mains supply pipes carrying cold water, thermal imaging can still be useful where a temperature differential exists between the pipe and the surrounding material, particularly in warmer weather when the ground temperature around the pipe is higher than the cold water flowing through it. The effectiveness depends on the conditions at the time of the survey.
What Thermal Imaging Cannot See
Thermal imaging identifies zones of thermal irregularity, not the pipe itself or the exact leak point. It tells the specialist where to focus the investigation rather than providing a definitive answer on its own. Thick concrete, deep screed, certain insulation types, and surface coverings with high thermal mass can reduce the precision of the thermal signal. This is why thermal imaging is typically used as the first stage of the investigation, with other methods providing confirmation.
The results of a thermal imaging survey are also weather-dependent. The temperature contrast between the building interior, the pipe, and the surrounding material affects how clearly the thermal signature reads. An experienced specialist will assess the conditions before the survey and advise on whether thermal imaging is likely to be the most productive method to lead with.
Also Read: Why Does Boiler Pressure Keep Dropping Without a Visible Leak?
Acoustic Leak Detection: Listening Through the Building Structure
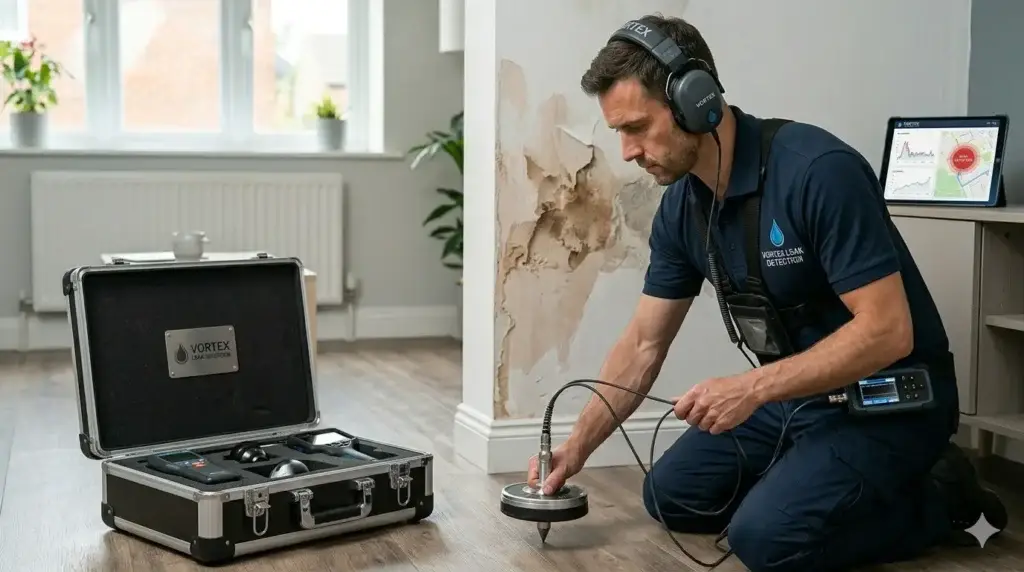
Acoustic leak detection equipment is designed to hear what the human ear cannot. When water escapes from a pressurised pipe through a small aperture, it produces a sound: a hiss, a trickle, or a specific acoustic frequency generated by the turbulence of water under pressure escaping into the surrounding material. This sound travels through the structure around the pipe and can be detected at the surface above using sensitive specialist equipment.
How Acoustic Equipment Detects Water Escaping
A specialist using acoustic detection places sensors, microphones, or listening probes at intervals along the suspected pipe route, either on the floor surface, on a wall, or on the ground above a buried pipe. The equipment amplifies and filters the sound signals, allowing the specialist to distinguish between the acoustic signature of an escaping leak and the background noise of the building or surroundings.
By comparing the signal strength at different points along the pipe route, the specialist can identify the section where the sound is loudest or most distinct. This narrows the investigation from a broad zone to a specific section of pipework, typically to within a metre or so of the actual leak point, depending on the pipe material, depth, and ground conditions.
Where Acoustic Detection Works Best
Acoustic detection is effective on a wide range of pipe types and locations. It works well on copper and plastic pipework in walls and floors, on buried supply pipes beneath gardens and driveways, and on heating circuit pipes beneath screeded floors. It is one of the most versatile detection methods available because it does not depend on temperature differences or on the pipe carrying a specific type of gas.
The method is less effective in very noisy environments, in locations where significant background vibration is present, or where the pipe is buried at extreme depth with dense sound-absorbing material around it. In these situations, it is typically combined with tracer gas to provide the confirmation that acoustic detection alone cannot deliver.
Tracer Gas: Pinpointing the Exact Leak Position
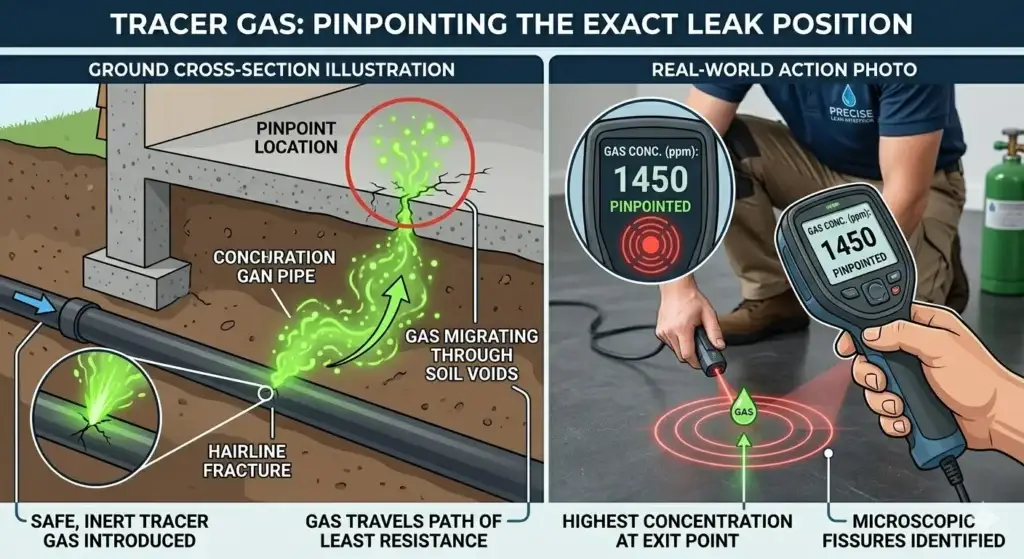
Tracer gas is the most precise of the three core detection methods and is used to confirm the exact location of a hidden leak once thermal imaging and acoustic detection have identified the suspect zone. It removes the remaining uncertainty and allows a targeted repair to be made with confidence.
How Tracer Gas Is Used
The specialist introduces a mixture of tracer gas into the pipe being investigated. The gas mixture typically consists of nitrogen and a small proportion of hydrogen. This combination is safe, non-toxic, and lighter than air, which means it rises naturally through the surrounding material once it escapes at the leak point.
Once the gas has been introduced and pressurised in the pipe, the specialist moves a sensitive probe slowly across the surface above the pipe route. Where the gas has escaped from the pipe and risen through the building material to the surface, the probe detects its presence. The precise point where the reading is strongest corresponds to the location of the leak in the pipework below.
The result is a confirmed leak location that is accurate enough for a plumber to access and repair the pipe at the identified point, without needing to open up a large section of floor or wall to find it.
Is Tracer Gas Safe?
Yes. The tracer gas mixture used in leak detection is non-toxic, non-flammable, and poses no health or safety risk to the property’s occupants or to the building fabric. The hydrogen proportion used is well below any flammability threshold. The gas dissipates naturally once the test is complete and leaves no residue. It is routinely used in domestic properties, including occupied homes, and is a well-established method across the UK leak detection industry.
Moisture Meters and Endoscopes: Supporting Tools in the Process
Alongside the three core methods, specialist leak detection surveys often make use of additional supporting equipment that adds detail and confirmation to the investigation.
A moisture meter measures the actual moisture content of a building material at the surface or at a small depth of penetration. By taking readings at multiple points across a suspected leak area, a specialist can map the distribution of moisture within the building fabric and identify where saturation is most concentrated. This helps confirm that the thermal or acoustic signal being detected corresponds to genuine moisture accumulation rather than a temperature variation with another cause.
An endoscope, or borescope camera, is a thin flexible camera that can be passed through a very small access point into a wall cavity, ceiling void, or floor space to provide a direct visual inspection of the area around the pipe. Where a small access point is available, or can be made with minimal disruption, an endoscope can confirm the presence of moisture or even identify a visible leak point that the other methods have located. It is particularly useful in wall cavities and ceiling voids where direct visual access is not otherwise possible.
How the Methods Are Used Together in a Real Investigation
In practice, a specialist leak detection survey does not use a single method in isolation. The investigation is a staged process that moves from broader identification to precise confirmation, with each method building on the findings of the previous one.
Stage One: Identify the Zone
The specialist begins by assessing the symptoms: the location of the boiler pressure loss, the position of any damp patches, the route of the pipework, and the areas of the property where the leak is most likely to be occurring based on the system layout. Thermal imaging is typically the first active detection method used, scanning the floor and wall surfaces to identify areas of thermal irregularity that correspond to escaping water.
The outcome of stage one is a defined zone of suspicion: an area of the floor or wall within which the leak is most likely to be occurring. This zone may be several square metres at this stage.
Stage Two: Narrow Down the Section
Acoustic detection equipment is used within the identified zone to narrow down the leak to a specific section of pipework. The specialist places sensors at intervals along the pipe route within the zone and compares the acoustic signals to identify where the sound of escaping water is strongest.
The outcome of stage two is typically a section of pipework of one to two metres in length within which the leak is located. For many investigations this level of precision is sufficient to proceed with a targeted repair.
Stage Three: Pinpoint the Exact Position
Where the repair will require precise access, or where the investigation needs to confirm a specific point rather than a section, tracer gas is introduced. The probe is moved slowly across the surface above the narrowed-down section and the highest reading identifies the exact leak position.
The outcome of stage three is a confirmed leak location accurate enough for a plumber to make a targeted access, repair the pipe, and reinstate the floor or wall at the smallest possible opening. The specialist documents the findings and provides the homeowner with the information needed to brief the repair plumber.
What a staged investigation delivers: A confirmed leak location without exploratory damage to floors or wallsAn understanding of which type of pipe is involved and what the repair is likely to entailDocumentation of the findings for insurance purposes where applicableClarity on the extent of moisture saturation in the surrounding materialA precise brief for the repair plumber, reducing the area of access neededPeace of mind: a confirmed answer rather than continued uncertainty.
Check Also: Under Floor Heating Leak or Surface Moisture? How to Tell the Difference
What a Specialist Investigation Actually Looks Like in Practice
For a homeowner who has not had a leak detection survey before, knowing what to expect from the visit removes a significant amount of uncertainty.
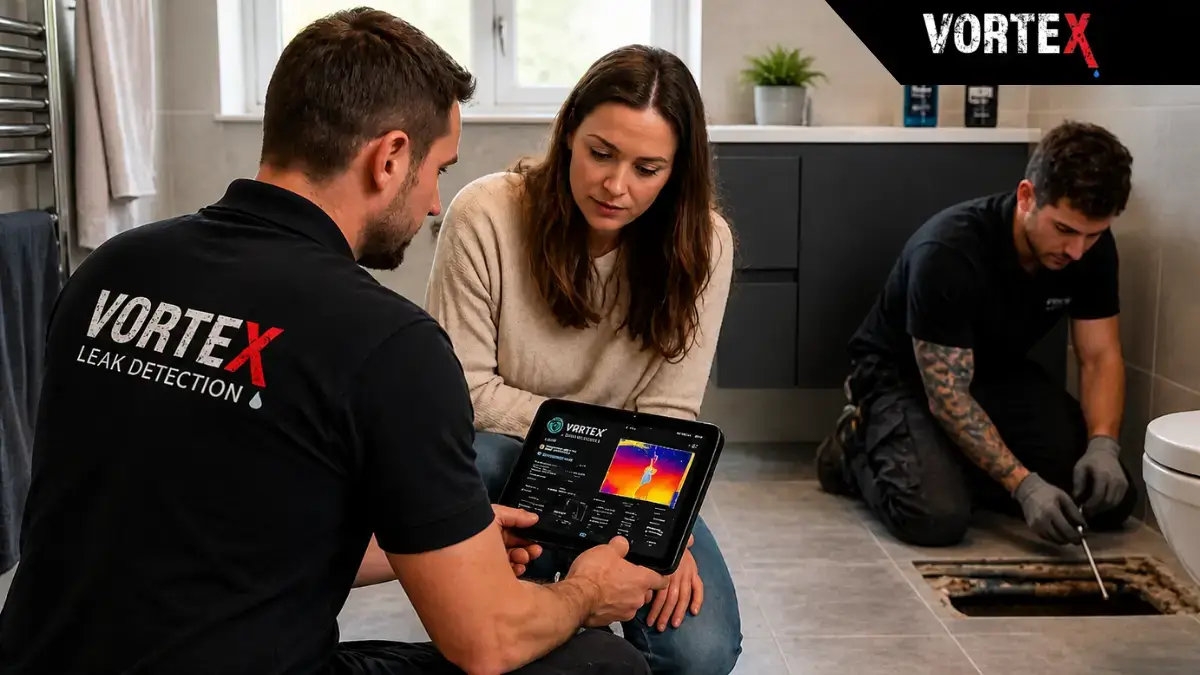
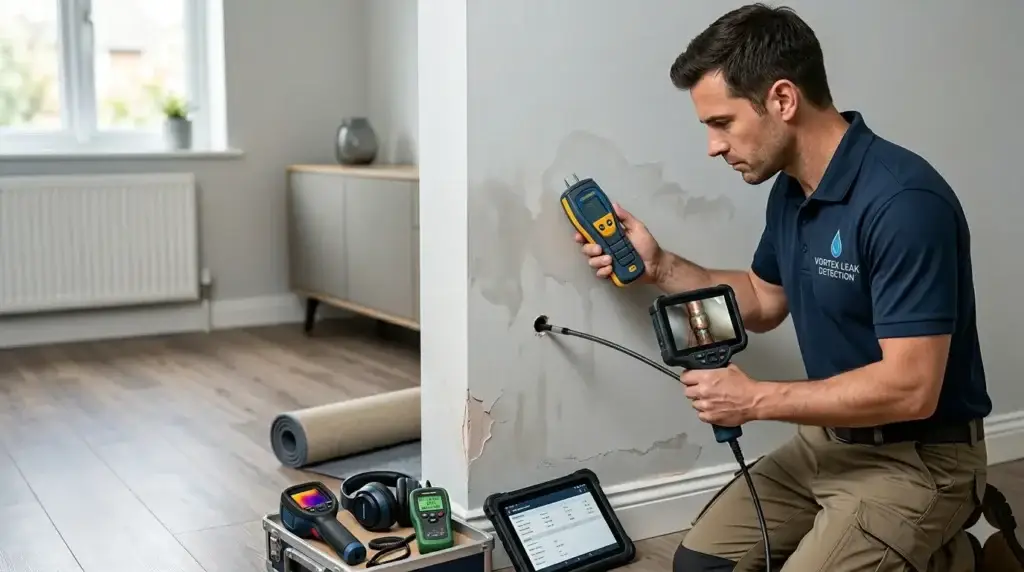
The specialist arrives with a set of detection equipment: a thermal imaging camera, acoustic detection devices, tracer gas equipment, and moisture meters as a minimum. Before starting any active detection, they will discuss the symptoms with the homeowner: where the boiler pressure has been dropping, whether any damp patches have been noticed, the age and layout of the heating and plumbing system, and any recent work done on the property.
They will then systematically work through the property, using the methods described above in the sequence appropriate to the suspected leak type and location. For an underfloor heating leak in a screeded floor, thermal imaging typically leads. For a buried mains supply pipe, acoustic detection may lead. The sequence is adapted to the situation.
A typical domestic leak detection survey takes between two and four hours, depending on the property size and the complexity of the pipe layout. The specialist will explain the findings clearly before leaving and will indicate what the next step should be, whether that is a targeted repair by a plumber, a further investigation of a secondary area, or simply monitoring where the evidence is inconclusive.
No floor is lifted. No wall is opened. No concrete is broken. The detection phase is non-invasive from start to finish.
When Is Exploratory Access Actually Needed?
Non-invasive detection is highly effective in the majority of hidden leak situations encountered in domestic properties. But it would not be accurate to claim it is effective in every conceivable scenario without qualification.
There are situations where the detection equipment produces ambiguous results: where the pipe layout is unusual, where multiple potential leak zones are present simultaneously, where the building material around the pipe significantly attenuates the signal, or where a very slow and intermittent leak does not produce a strong enough signal to locate precisely.
In these situations, a small and targeted exploratory access may be recommended, typically a single core drill or a small cut in the floor surface at the point the investigation has identified as most probable. This is not the same as breaking up an entire floor to search for a leak. It is a targeted access at a confirmed suspect point.
A professional specialist will be clear and honest with the homeowner if the investigation has not produced a definitive result and will explain what exploratory access would involve and why it is being recommended. The goal throughout is always to minimise disruption while maximising diagnostic certainty.
How Accurate Is Non-Invasive Leak Detection?

When the three core methods are used in combination by a trained and experienced specialist, the leak location identified is typically accurate enough for a plumber to make a targeted repair at the confirmed point without needing to open up a large area.
The accuracy depends on several factors that the specialist will assess at the time of the survey: the type and material of the pipe, the depth of burial, the surface covering above the pipe, the temperature conditions at the time of the survey, and the rate of water loss from the leak. A very slow leak in a deep pipe beneath a thick screed is more challenging to locate precisely than a faster leak in a shallower pipe beneath a standard floor covering.
Experienced specialists understand these variables and adapt their methodology accordingly. Where conditions are less favourable for one method, they compensate with greater reliance on the others. The combination of thermal, acoustic, and tracer gas evidence, each independently pointing to the same location, provides a high level of confidence in the result.
It is worth noting that the alternative, which is opening up floors or walls without prior non-invasive investigation, carries its own inaccuracy risks. Without detection equipment, a plumber is making an educated guess about where to access the pipe. In many cases the first access point is not at the leak location, leading to multiple access points and a significantly larger area of disruption than a non-invasive investigation would have required.
Quick Reference: Which Method Works Best for Which Scenario?
Different leak scenarios suit different leading detection methods. This reference covers the most common situations.
| Underfloor heating leak in screeded concrete floor: Thermal imaging is the primary method, highly effective due to warm water in the circuitAcoustic detection confirms the section within the thermal zoneTracer gas confirms the exact position if targeted repair access is needed |
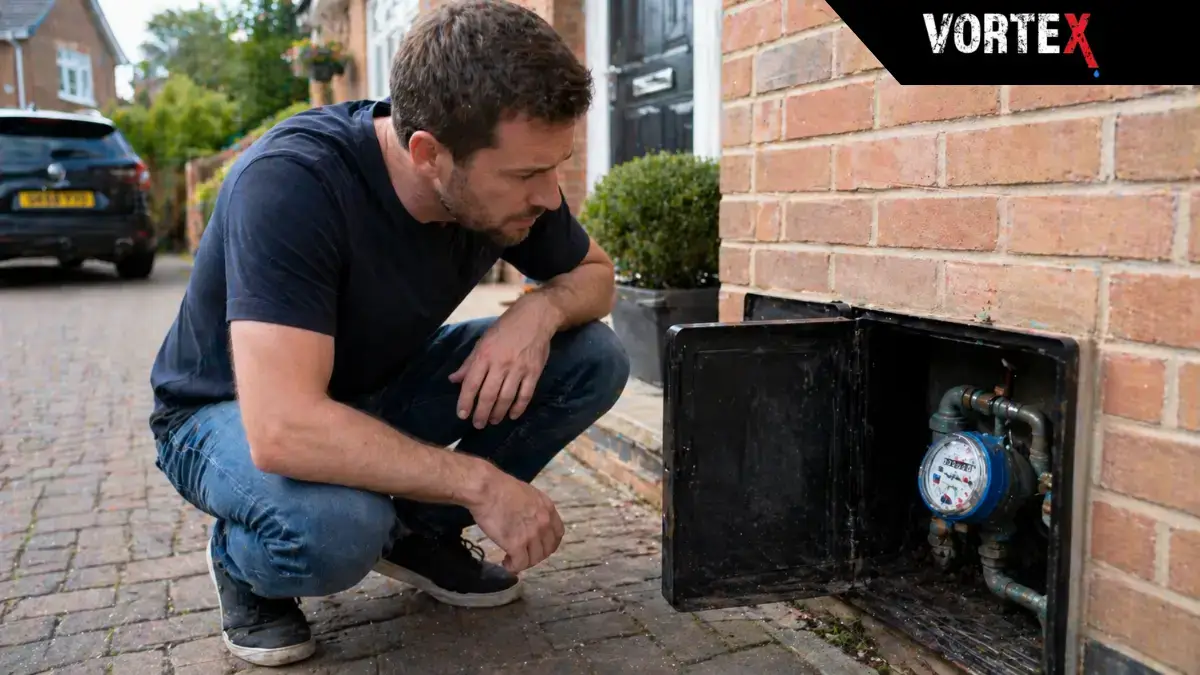
| Buried mains supply pipe leak beneath a garden or driveway: Acoustic detection is the primary method, effective on pressurised supply pipeworkThermal imaging may add support depending on ground temperature conditionsTracer gas confirms the exact surface position before any excavation |
| Hidden internal plumbing leak within a wall or floor void: Acoustic detection leads, listening through the wall or floor surface above the pipe routeMoisture meter confirms the pattern of saturation in the building materialEndoscope provides visual confirmation where a small access point is availableTracer gas confirms position before any wall or floor is opened |
| Heating circuit leak in a pipe running through a timber floor void: Acoustic detection leads for the leak sound signatureThermal imaging supports by identifying thermal irregularity in the floor aboveEndoscope via an existing access point may confirm the situation directly |
What Happens After the Leak Is Found?
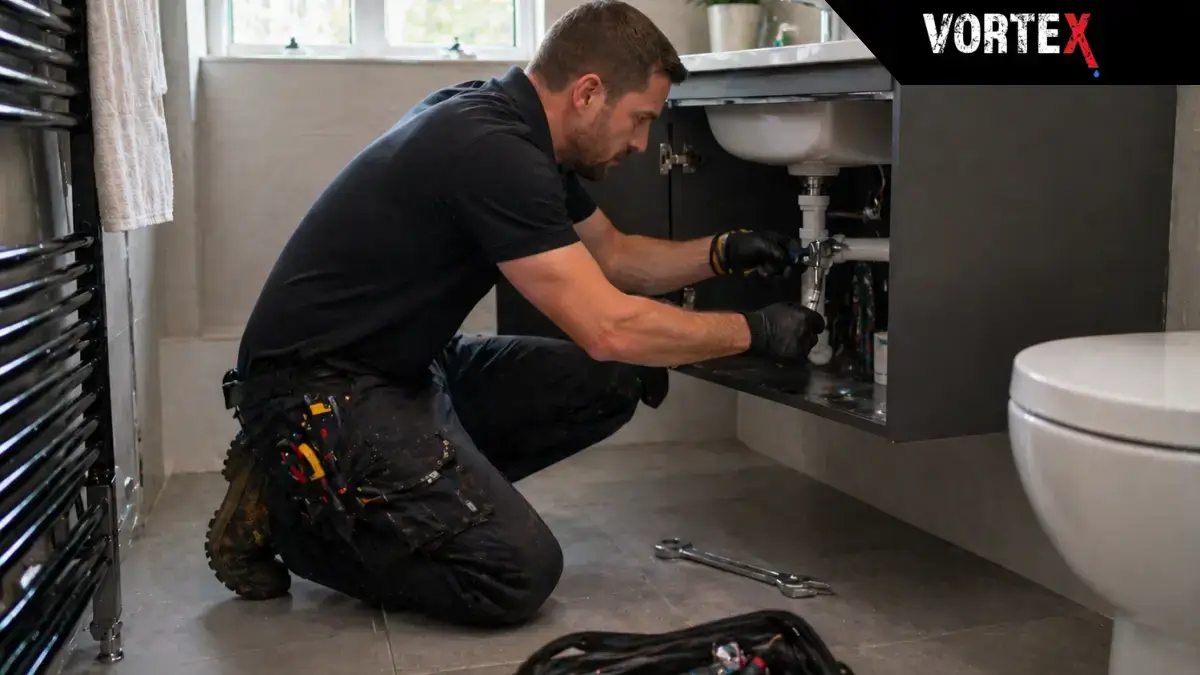
Leak detection and leak repair are two distinct services. A specialist leak detection company locates the source of the leak and documents the findings. The physical repair of the pipe is typically carried out by a qualified plumber once the location has been confirmed.
This distinction is important to understand. The detection survey identifies precisely where the problem is. The plumber uses that precise location information to make a targeted access, carry out the repair, and reinstate the affected surface. Because the access point is targeted, the disruption is minimised: a single core drill or small floor cut at the confirmed location rather than a speculative open-up across a large area.
In situations where the leak is covered by a home insurance policy under a trace and access clause, the specialist’s detection report is typically required as part of the insurance claim. The report documents the methods used, the evidence found, and the confirmed leak location, providing the insurer with the information needed to assess the claim.
After the repair is complete, the affected area, whether screed, plaster, or floor covering, will need to dry out before it can be reinstated fully. The time required depends on how long the leak has been present and how much moisture the surrounding material has absorbed. In significant cases this drying period can take weeks to months, and a specialist drying survey may be recommended to confirm when the material is sufficiently dry for reinstatement.
What to Do If You Suspect a Hidden Leak
If you have noticed any of the signs of a hidden leak, whether recurring boiler pressure loss, unexplained damp patches, a high water bill, soft flooring, or a persistent musty smell, the most effective response is to arrange a specialist investigation rather than wait for the problem to become more obvious or attempt to locate it through exploratory damage.
Non-invasive specialist detection finds the source of hidden leaks systematically and precisely without the disruption that makes many homeowners hesitant to act. The earlier the investigation happens, the less damage the leak has caused to the surrounding structure, and the simpler and less costly the repair that follows.
The Vortex Leak Detection team uses thermal imaging, acoustic detection, tracer gas, and supporting moisture measurement equipment to investigate hidden leaks in domestic and commercial properties. Read more about the detection technology used on the Vortex technology page, or get in touch to discuss your situation and arrange an assessment.
You do not have to break your floors to find the leak. Modern specialist detection locates hidden leaks precisely and without unnecessary disruption. If you are concerned about a hidden leak in your property, contact Vortex Leak Detection to arrange an investigation.