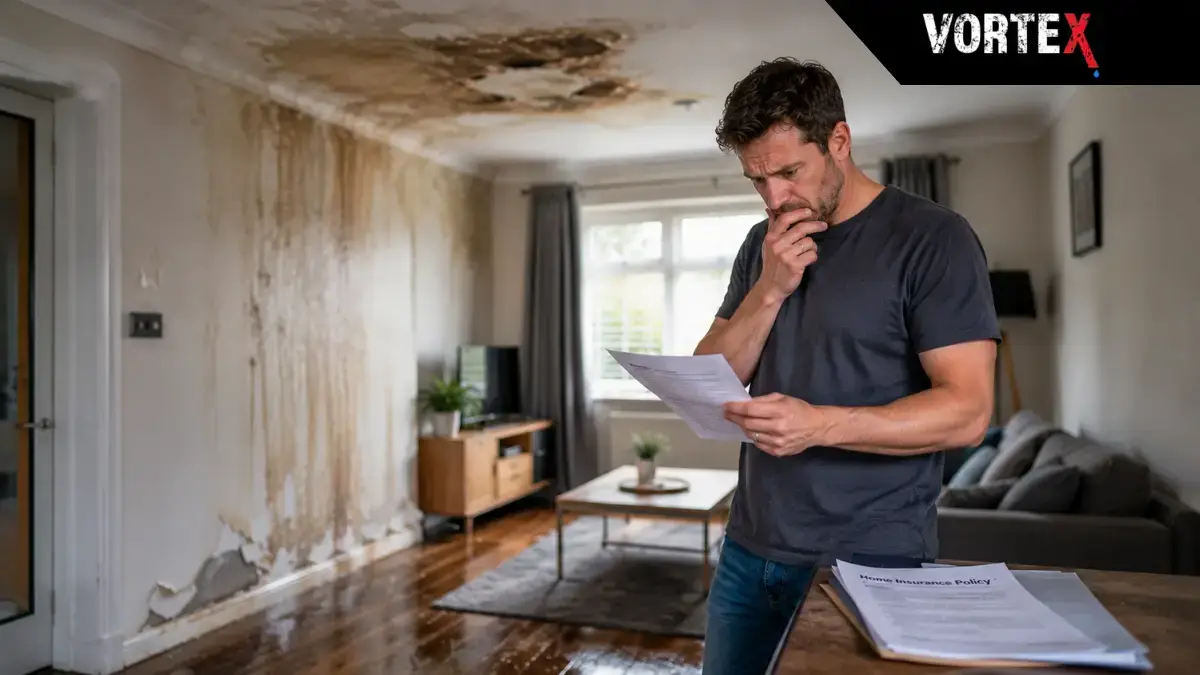
The instinctive response to a suspected burst or leaking pipe inside a wall is to consider opening the wall to find it. This is understandable but almost always the wrong first move. Breaking through plasterwork without knowing where the pipe is, and more specifically where within the pipe the failure has occurred, is speculative work with a meaningful probability of opening the wrong section, causing additional damage, and still not finding the leak.
Modern specialist detection methods allow a pipe failure inside a wall to be located precisely without any physical access to the wall itself during the detection phase. The wall is only opened at the confirmed position, as a targeted access for repair, after the leak has been identified. Understanding this changes the approach from guesswork to a methodical process that minimises disruption and damage.
| Quick AnswerA pipe leaking inside a wall produces signs including damp patches on the plasterwork, soft or wet sections of wall, paint or wallpaper lifting, a musty smell, or a damp patch on the floor adjacent to the wall. Specialist acoustic detection and thermal imaging can locate the pipe failure within the wall without requiring the wall to be opened. The access for repair is then made as a single targeted cut at the confirmed position. |
The Signs That Point to a Pipe Failing Inside a Wall
A pipe failure inside a wall produces several recognisable signs, though the combination and prominence of signs depends on how long the leak has been present and how fast water is escaping.
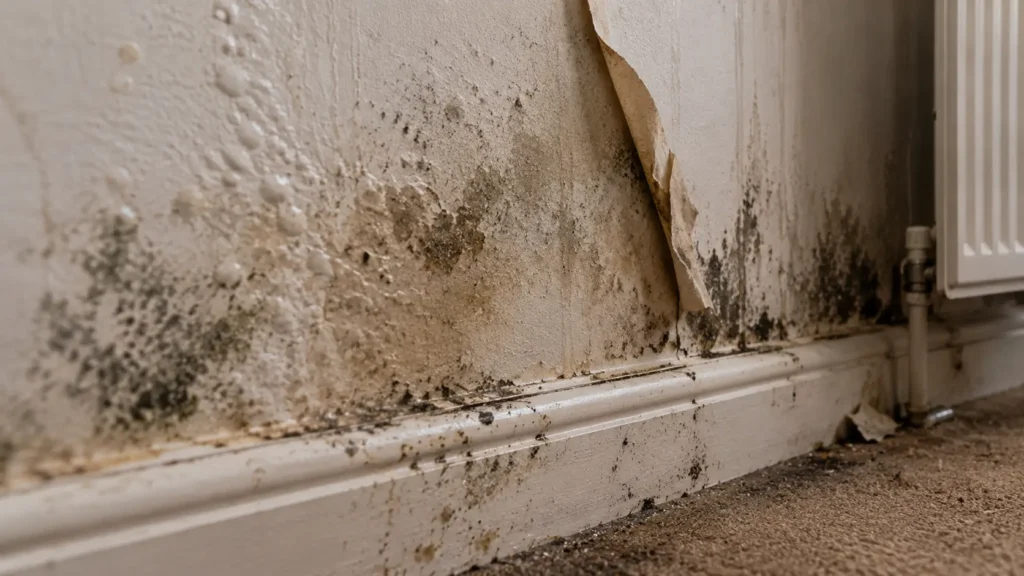
- A damp patch or tide mark appearing on the wall surface, often initially small and spreading gradually outward as saturation increases
- Paint or wallpaper beginning to lift, bubble, or separate from the wall surface in a localised area
- Plasterwork that sounds hollow when tapped, or that has a soft or powdery texture when touched
- A musty or damp smell coming from a section of wall with no obvious surface moisture source
- The floor adjacent to the wall feeling soft or damp, as moisture migrates from the wall into the adjacent floor
- Mould developing on the wall surface in a localised pattern that does not correspond to condensation zones
- The water bill rising or the overnight meter test showing movement with no other identified cause
- The boiler losing pressure if the pipe involved is part of the heating circuit
Types of Pipe That Run Through Walls and What Fails
Understanding which types of pipe typically run through wall cavities helps narrow the investigation. In most UK domestic properties, wall-enclosed pipes include cold water supply pipes distributing cold water from the stop tap to outlets throughout the building, hot water distribution pipes from the cylinder or combination boiler to outlets, central heating flow and return pipes connecting the boiler to radiators, and in some configurations waste pipes from sinks and basins routed through partition walls.
The most common failure modes for wall-enclosed pipes are corroded or pitted copper pipe developing a pinhole perforation, failed compression or push-fit joints where two pipe sections connect inside the wall, and cracked or split plastic pipework resulting from ground movement, building settlement, or thermal cycling. Older properties with lead pipework or early steel pipes in walls carry elevated risk of failure compared to modern plastic systems.
Why Speculative Wall Opening Is the Wrong First Response
The case against opening the wall speculatively, without prior detection, is both practical and financial. A wall cavity contains pipework that may run in any direction: vertically, horizontally, or diagonally to reach an outlet. The damp patch on the surface is not necessarily at the same position as the pipe failure: water migrates through the wall material, runs along timber elements, and often appears on the surface some distance from the actual leak point.
Without detection equipment, a plumber opening the wall at the position of the damp patch may find dry plasterboard and no pipe. They must then open an adjacent section. And then another. Each section represents cost, disruption, and structural damage to the wall that requires reinstatement. If the pipe runs in an unexpected direction, multiple access points may be required before the failure is found.
Specialist detection with acoustic equipment and thermal imaging identifies the pipe route and the failure point within the wall before any access is made. The result is a single targeted cut at the confirmed position rather than a sequence of exploratory openings.
Practical Checks You Can Do Before Calling Anyone
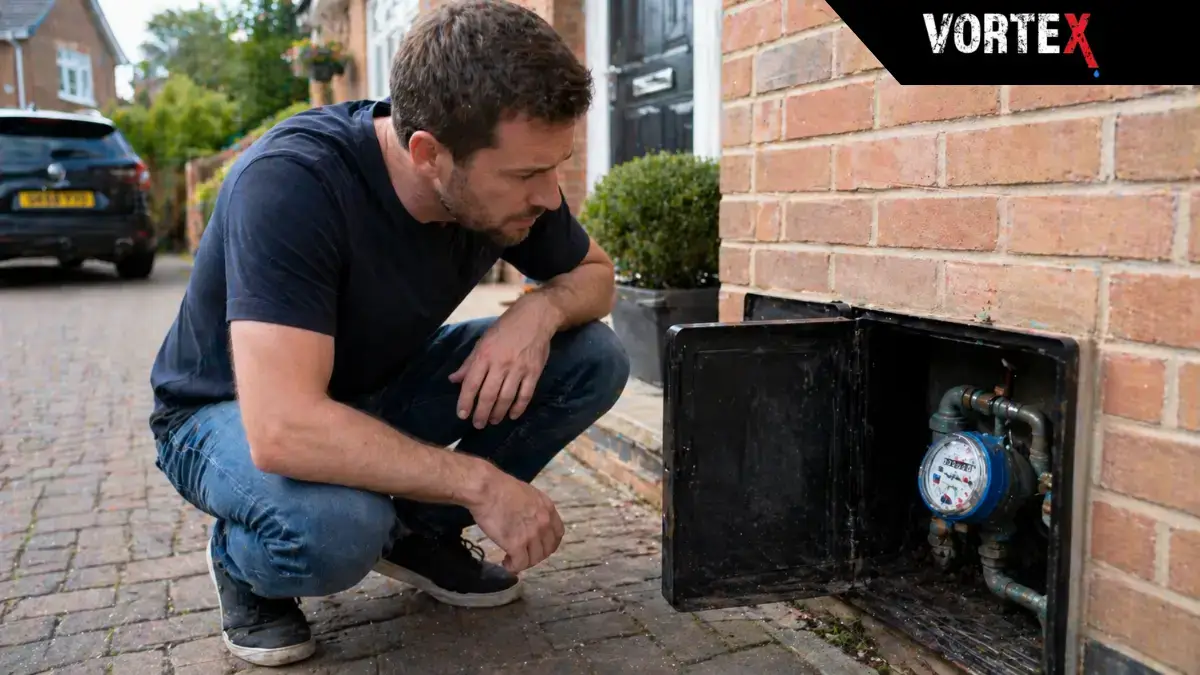
Before arranging detection, two practical checks help confirm that a pipe failure inside the wall is the most likely explanation for the symptoms.
The overnight meter test confirms whether water is actively leaving the plumbing system. If the meter moves overnight with everything turned off, water is escaping somewhere. Combined with wall symptoms, this strongly suggests an internal plumbing leak. The stop tap test then confirms whether the loss is on the supply side or the internal plumbing side.
For a heating system pipe, check the boiler pressure. If pressure is dropping repeatedly and the expansion vessel and PRV have been confirmed as sound, a concealed pipe failure somewhere in the circuit is the most likely remaining explanation. Wall-enclosed sections of the heating circuit are a common location for such failures.
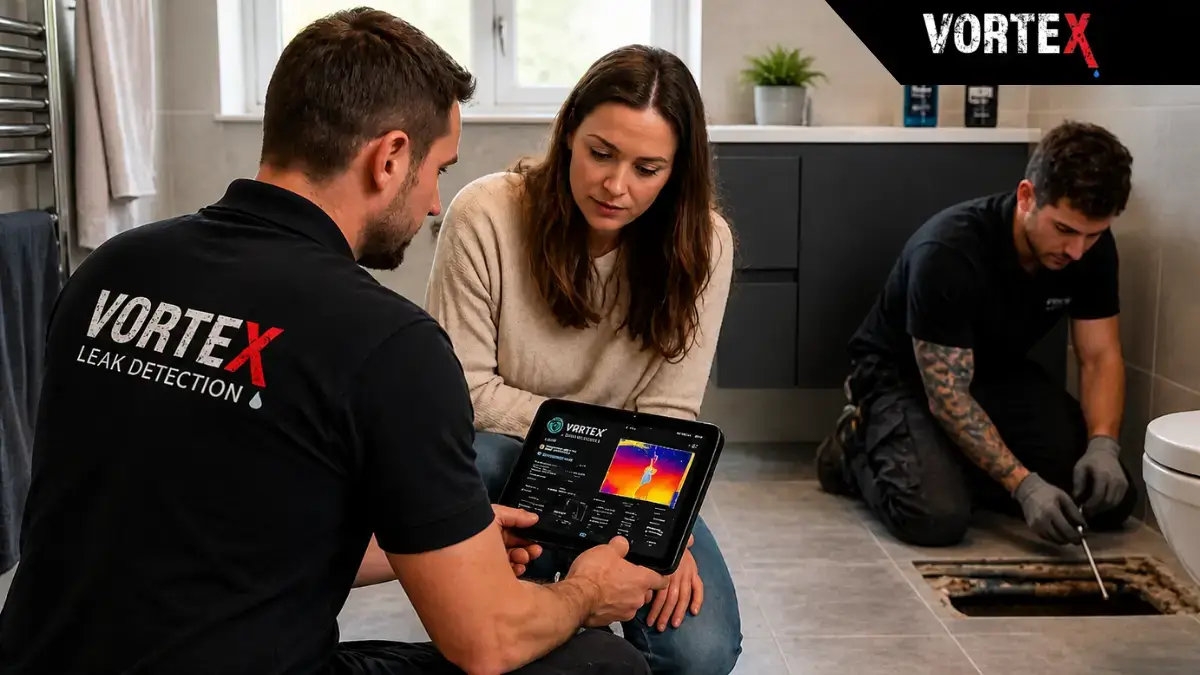
How Specialist Detection Locates a Wall Pipe Leak Without Damage
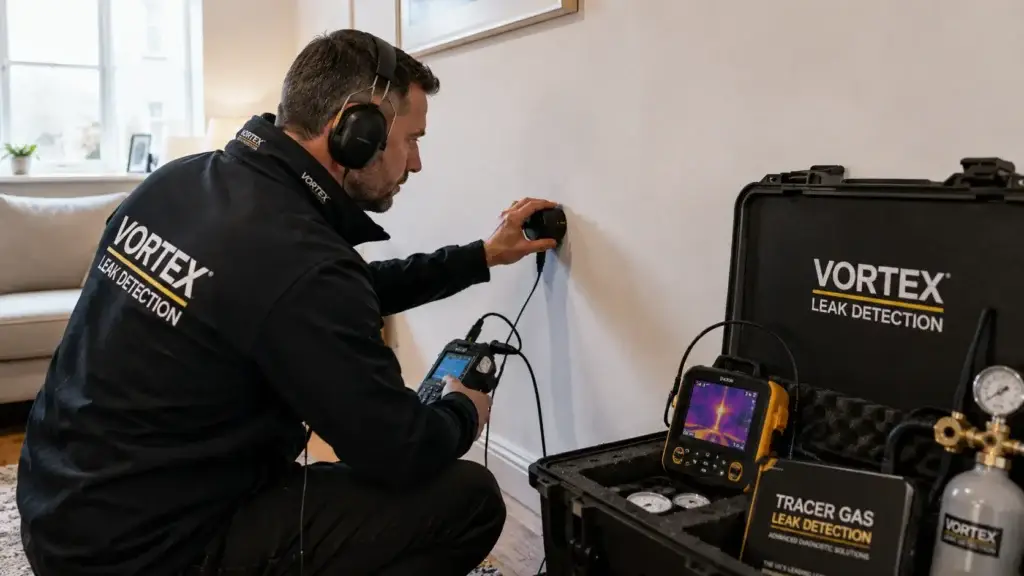
The three core detection methods, acoustic detection, thermal imaging, and tracer gas, each contribute differently to locating a wall pipe leak.
Acoustic Detection
Water escaping from a pressurised pipe inside a wall produces sound that travels through the wall structure. Acoustic sensors placed on the wall surface detect and amplify this sound, allowing the specialist to compare signal strength at different points along the wall and identify the section where the sound is strongest. This narrows the location from a broad wall area to a specific section of approximately one metre in length.
Thermal Imaging
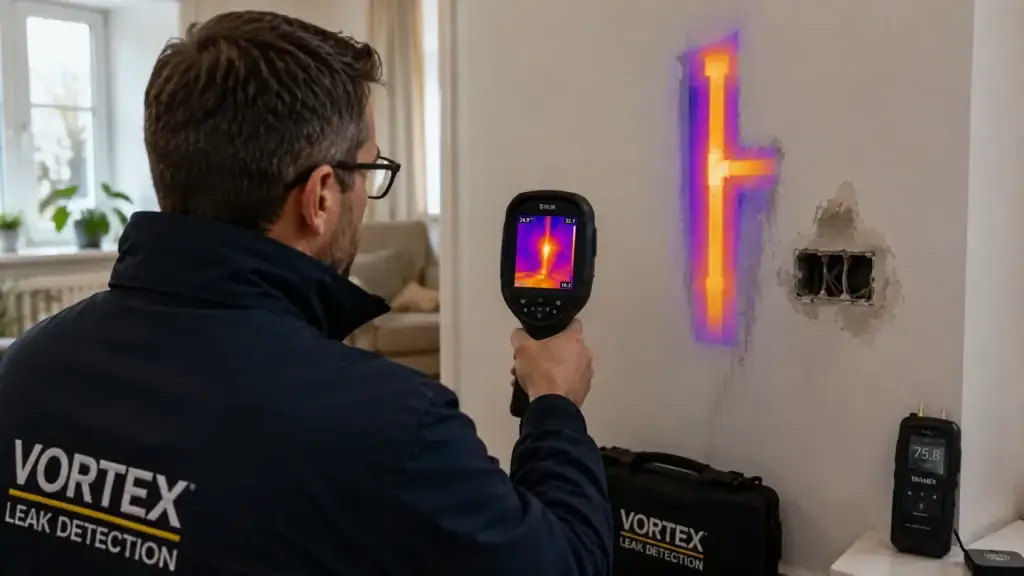
If the pipe involved carries warm water, such as a heating circuit pipe or a hot water distribution pipe, the escaping water alters the thermal distribution of the surrounding wall material. An infrared camera detects this as a thermal anomaly on the wall surface, helping the specialist identify the affected zone. For cold water pipes, the thermal signature is less pronounced but may still be detectable under the right conditions.
Tracer Gas
Once acoustic and thermal methods have narrowed the location, tracer gas introduced into the pipe escapes at the failure point and rises through the wall material to the surface. A sensitive probe detects the gas at its highest concentration, confirming the precise surface position of the failure. This is the confirmation that allows a targeted single cut to be made at the right point.
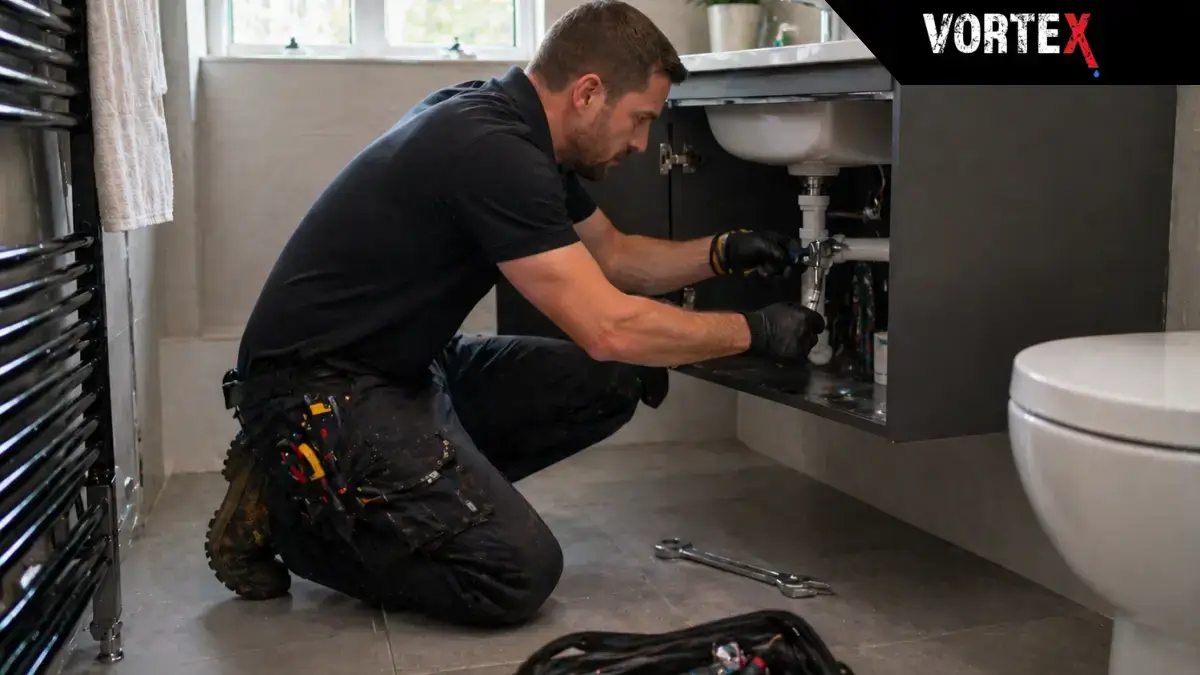
What Happens After the Leak Is Located
Once the failure position has been confirmed by detection, the plumber makes a targeted cut in the wall plasterwork at that specific location. The pipe section behind is exposed, the failure is repaired or the affected section is replaced, and the repair is tested before the wall is made good.
The cut is typically small, the minimum size needed to access and repair the pipe. This contrasts with the wider opening that would have resulted from speculative access without prior detection. The smaller opening reduces the reinstatement cost and simplifies the making-good work.
How Much Wall Needs to Be Opened for a Repair?
The size of the access opening depends on the type of pipe, the nature of the failure, and the space available to carry out the repair within the wall. For a pinhole in a copper pipe, the affected section may need to be cut out and bypassed, requiring an opening large enough to accommodate the repair method. For a failed joint, access to the joint alone may be sufficient.

In practice, targeted access following specialist detection typically involves a single opening of a manageable size, often 30 to 60 centimetres in each dimension, rather than the multiple larger openings that result from speculative access. The specialist’s location report gives the plumber the dimensions of precision they need to plan the repair access before they start.
Can the Wall Be Reinstated to the Same Standard?
In most cases yes, though the extent of reinstatement depends on the wall construction and the finish involved. Plasterboard walls can be patched and replastered to a standard indistinguishable from the original once the patch has cured and been decorated. Solid plaster walls require a matching plaster mix and a skilled plasterer to achieve a seamless finish. Tiled walls require the tiles above the access point to be removed and replaced, which may create a match challenge if the original tiles are no longer available.
The most important consideration for reinstatement is allowing sufficient drying time after the repair before the wall is closed. The building material around the pipe will have absorbed moisture during the leak period and needs to reach an acceptable moisture level before plasterboard and finishes are applied over it.
Quick Diagnostic Checklist: Is It a Pipe in the Wall?
| A pipe leak inside a wall is the likely cause if:A damp patch has appeared on a wall surface and is spreading or worseningThe damp is on an internal wall where condensation would not typically formPaint or wallpaper is lifting in a localised area of wallA musty smell is coming from the wall area with no obvious surface moisture sourceThe floor adjacent to the affected wall is also showing signs of moistureThe overnight meter test shows water movement with everything turned offThe boiler is losing pressure repeatedly if a heating pipe may be involvedThe damp patch does not correspond to any visible external water sourcePrevious surface treatment of the damp has not resolved the problem |
What to Do Next
If the signs above point to a pipe failure inside a wall, the most effective next step is specialist detection to confirm the position before any wall is opened. Vortex Leak Detection uses acoustic detection, thermal imaging, and tracer gas to locate wall pipe failures precisely, providing the confirmed location and a written report before any access work begins. Get in touch to discuss your situation and arrange an investigation.